

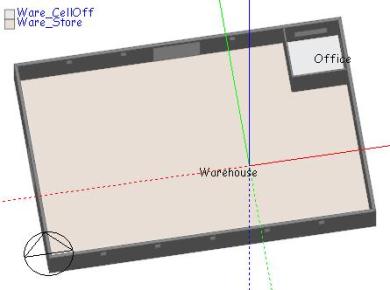
Sometimes it is necessary to create a smaller zone such as an office within a larger zone (e.g. a large warehouse space). This tutorial explains how to set up a simple 2 zone model such as that illustrated in the screenshots below where a small office is located in bottom corner of a larger warehouse space.
The steps involved are:
1. Draw the ground floor block including both office and warehouse. The block should be the height of the office space as the top of the block will form the ceiling of the office.
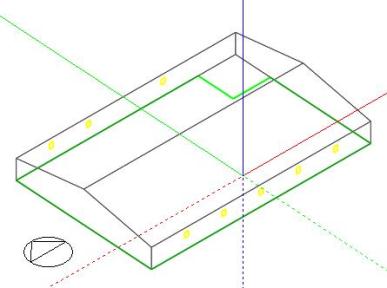
2. Draw the 1st floor block representing the high-level warehouse space.
3. Draw a hole in the floor of the 1st floor block to connect the upper and lower warehouse zones together. The upper warehouse zone should look something like the screenshot below. The green line shows the perimeter of the hole.
4. Select the Merge zones connected by holes model option to merge the upper and lower parts of the warehouse into a single zone.
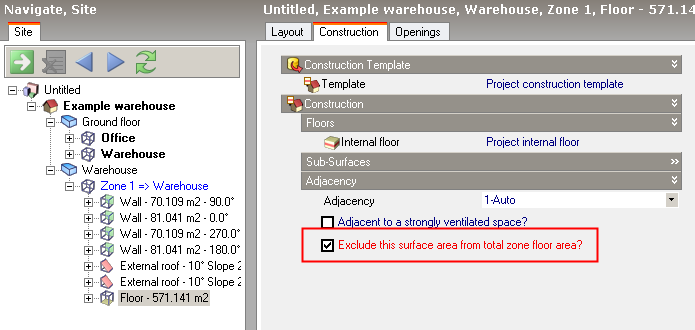
5. The 'floor' on top of the office zone is not usable floor area so go to this floor surface and select the Exclude this surface from total zone floor area option. This indicates that the surface is not part of the building useable floor area. This step ensures that this floor area is not counted in the floor area provided to certification tools such as SBEM. This step is not currently required for EnergyPlus simulations.
Note: if the excluded floor surface contains some external adjacencies as well as internal ones these external areas will not be subtracted from the zone floor area.
So the building now consists of 2 zones - an Office and a Warehouse zone. This model is available as one of the DesignBuilder example templates.